Custom Auras
With the release of version 3.0, it is now possible to easily define your own custom aura images within Fantasy Grounds, and using your own image assets. This eliminates the need for the separate Aura Customizer extension which has been deprecated.
To define or change an aura, open the Options window, and click the Auras button.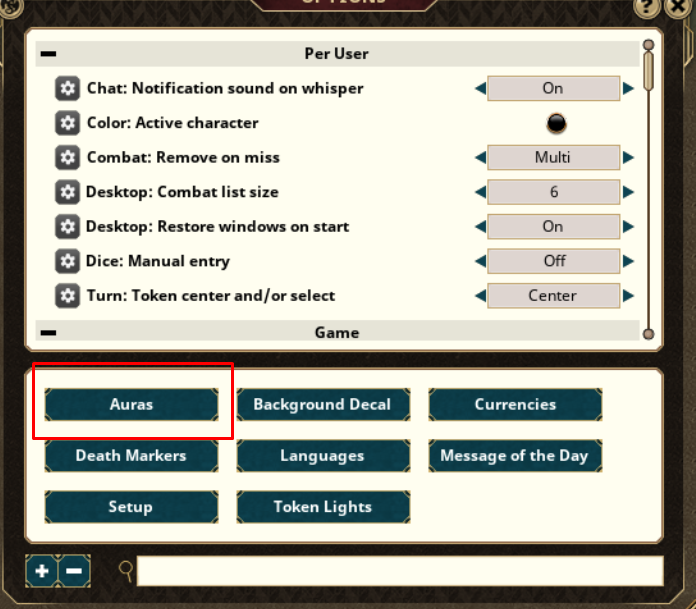
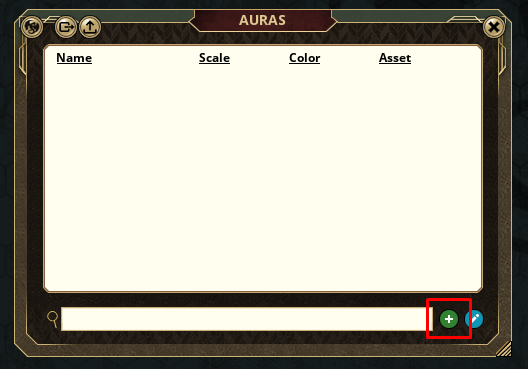
Name the Aura
Each aura must have a unique name which adheres to the following rules.
The aura name can be any combination of letters and numbers. No spaces or special characters are allowed. If you type in a name including a space or special character, it will be automatically removed from the name.
The aura name must not be any of the following reserved keywords "all, ally, enemy, foe, friend, neutral, none, cube, point, self, notself". These words have special meaning within the Aura extension and cannot be used.
All names are case insensitive. This means the extension will treat "octo", "Octo", "OCTO", and "oCtO" as the same. If there are duplicates, the extension will pick the first one it matches with.
Scale the Aura
Custom aura images may not always be drawn to the expected size on screen due to the presence of empty transparent space at the edges of the image. The Scale field is used to increase or decrease the drawn aura to better represent the actual aura effects dimensions.
The value of the Scale field is a % of the actual drawn aura size. The default value is 100 which means to draw the image at the exact size of the stated aura effect, even if this results in the visual of the graphic not reaching all the way to the expected size.
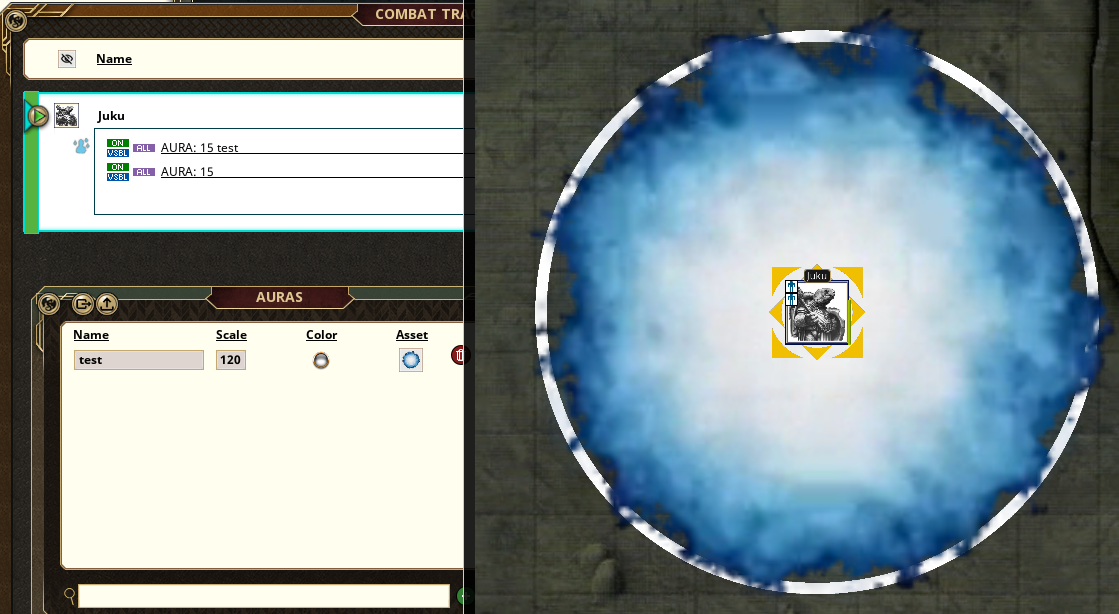
For example, in the following image. The token has two auras drawn at size 15. The white ring aura represents the actual size that FG calculates the aura at. The image being used for the test aura however, has transparent space around it, making the image appear to not fill the space out to the edge.
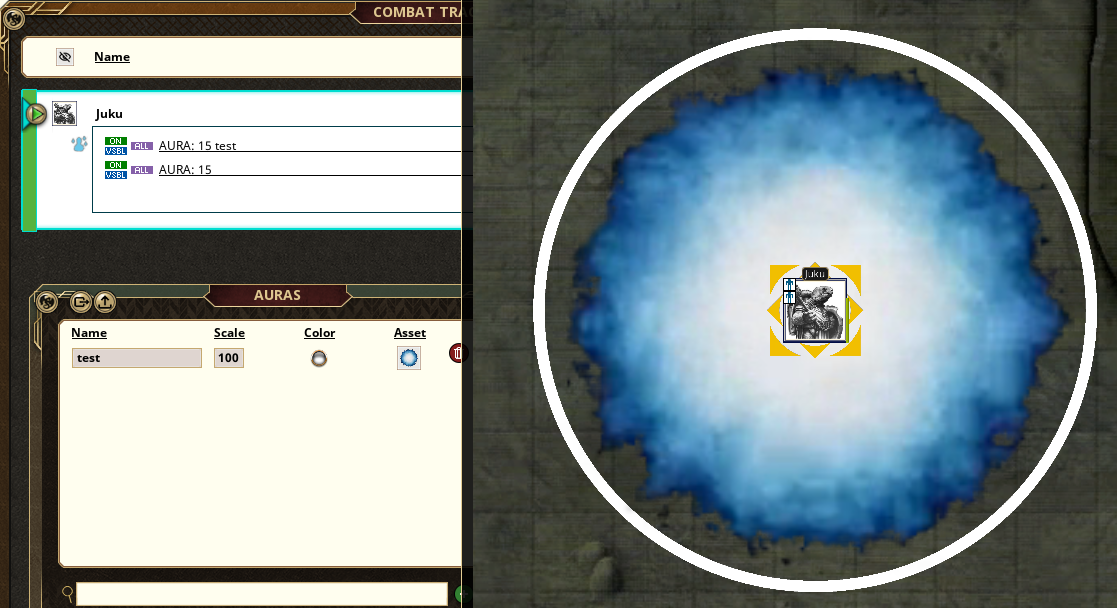
By adjusting the scale slightly, we can make the image fit right to the edge of where it should be.
Select the color
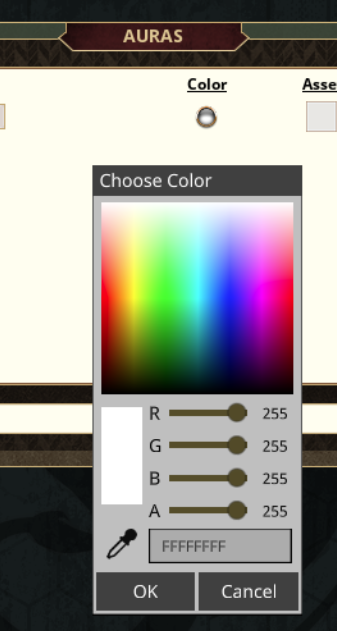
Click on the color selector to designate a color that will be used as a mask to the aura image. The Default color is fully opaque white. In the color selector, you can change the color and/or change the transparency to be used. The transparency will apply to the aura image selected.
Example.
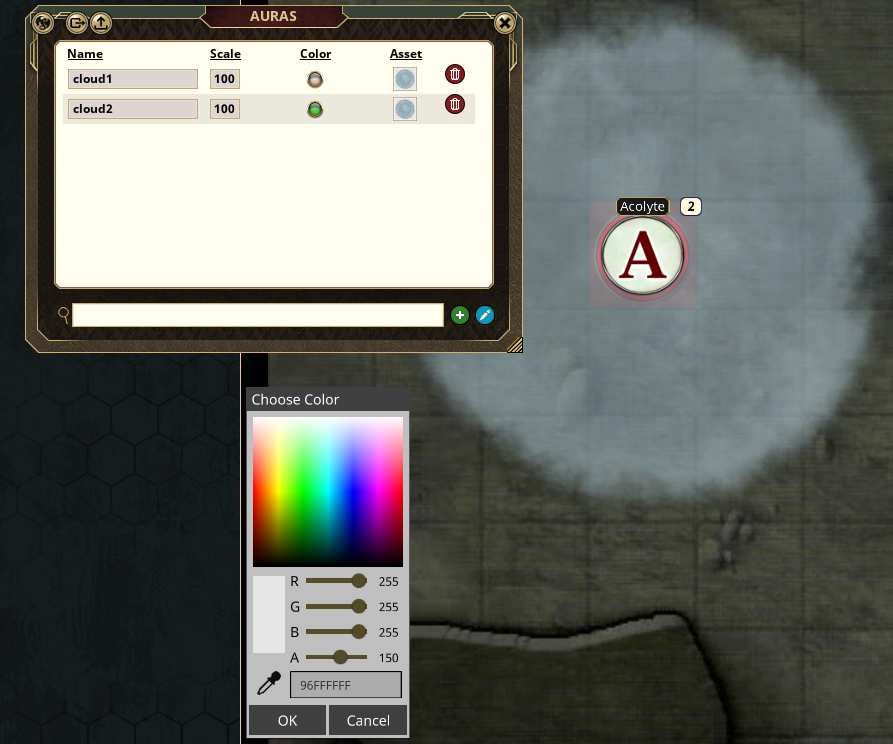
In this example, there are two auras, each using the exact same image asset. The only thing different is the selected color. For cloud1, I use RGB value of all white, and add a slight transparency.
For cloud2, I have set the color to a greenish hue with the same level of transparency. The result is a greenish overcast on top of the default cloud image.
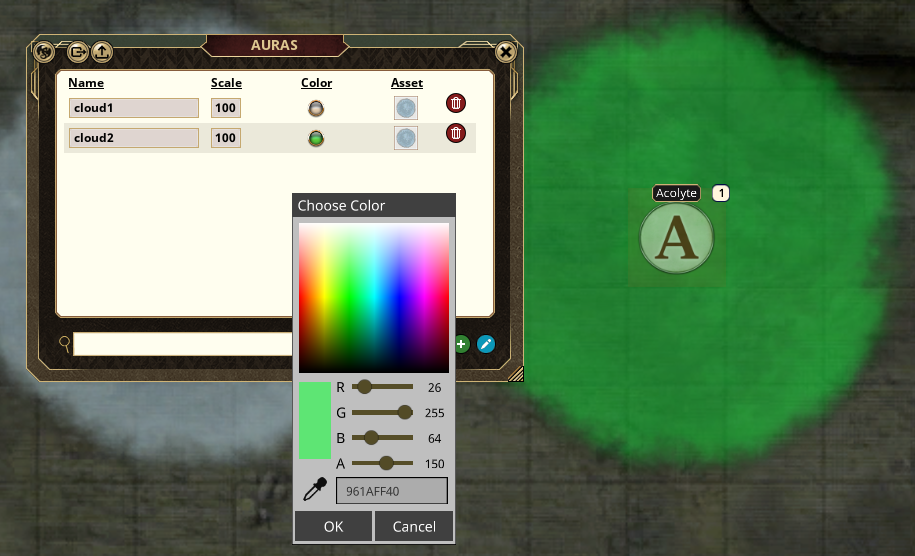
Final result.
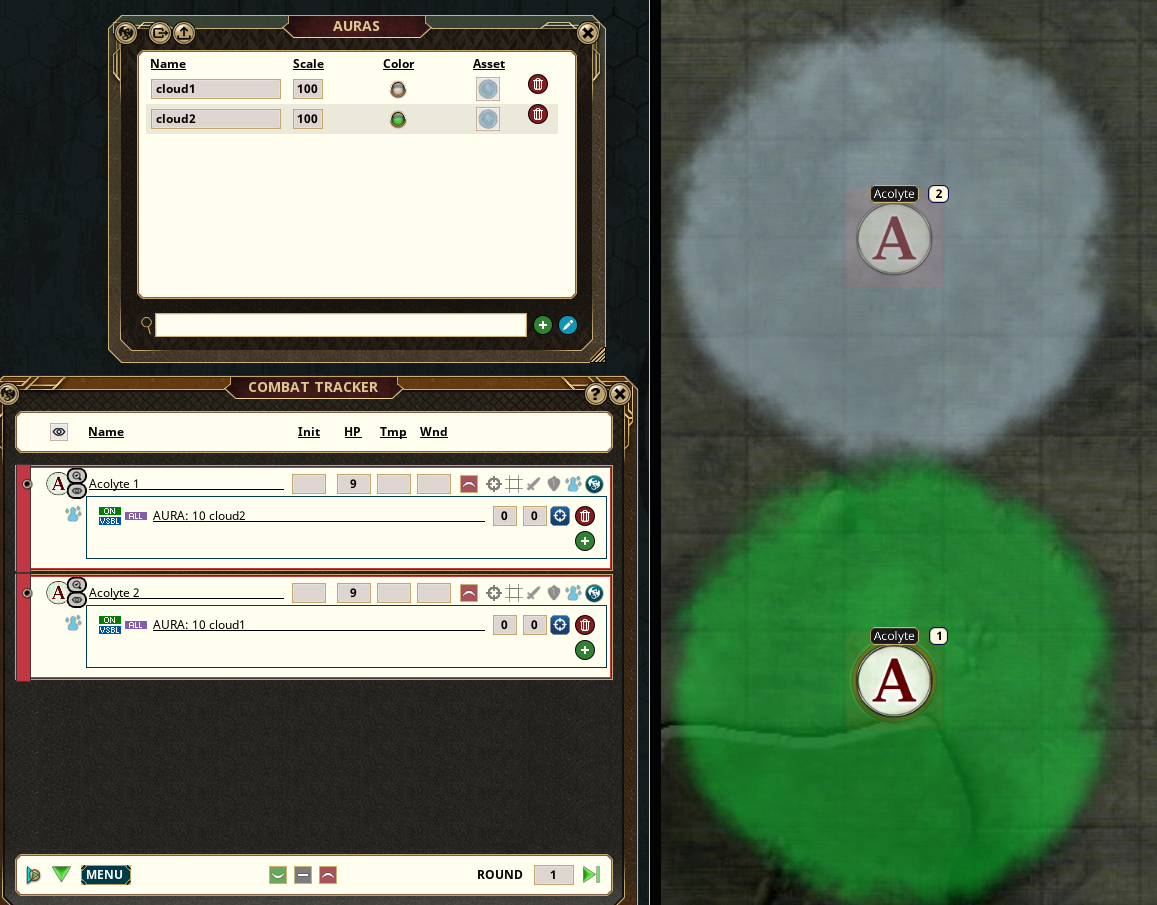
In this way, many interesting, different looking auras can be created with the same base image asset.
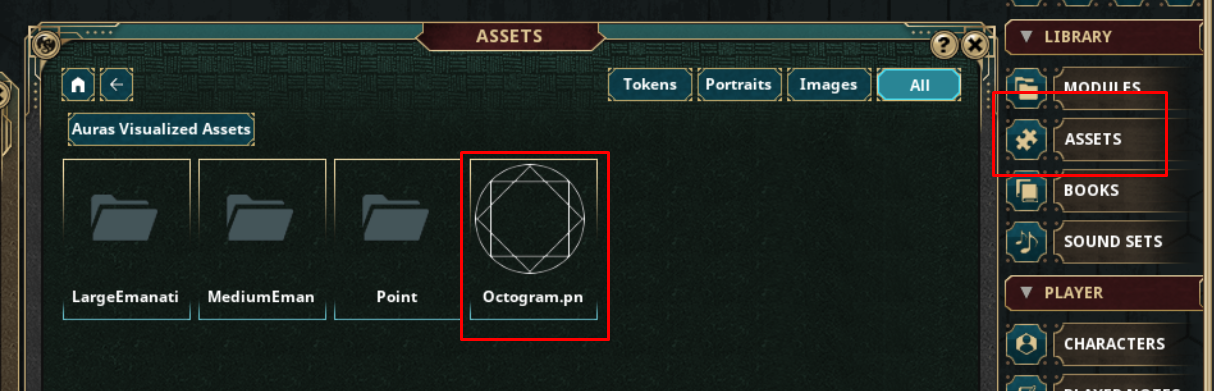
Select the Asset
To add an aura image, open the Assets window. Find the asset you wish to use. For convenience, all of the graphic assets included with the deprecated Aura Customizer extension, have been included as a module. You can also use any other asset you might wish, including animated webm graphics.
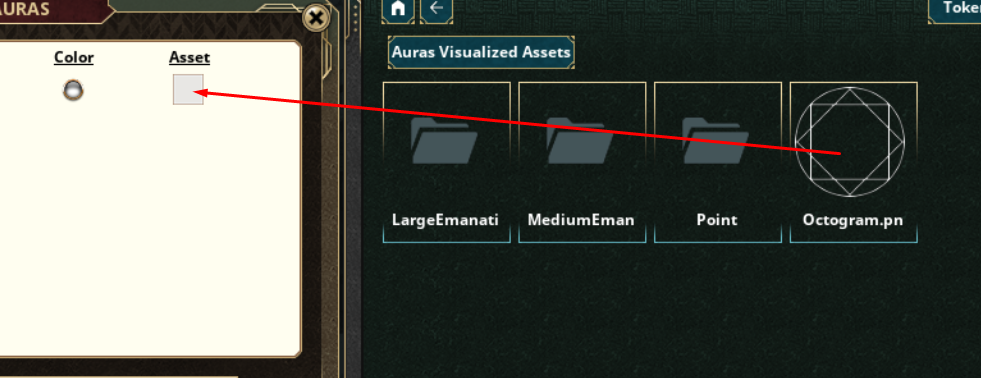
Drag the Asset you wish to add to the Asset field.
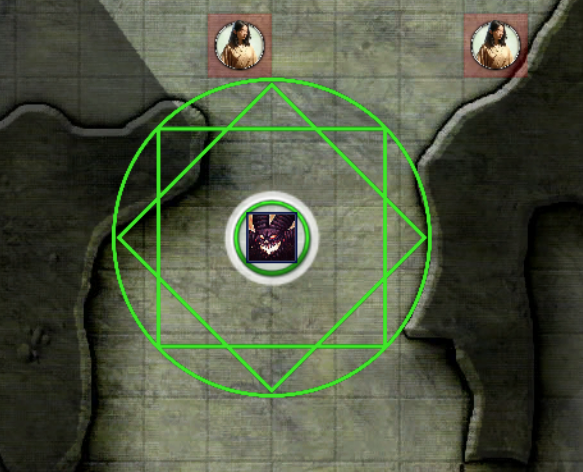
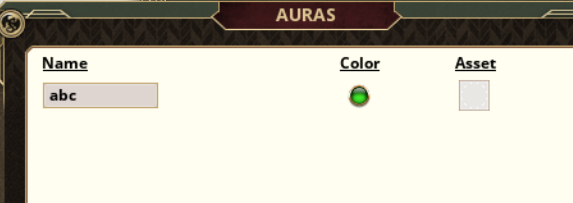
Here is my resulting example. A green octogram aura with the name "abc"
Using the custom aura
To use the custom aura, define the AURA effect and use the name of the aura after the range. For example, using my "abc" aura defined above, it would look like

The resulting Aura on the map would appear like this